Rudiments of Spreadsheet Use
This short page discusses the basic ways of using a shared Google spreadsheet. Subsequent pages in this section will discuss some advanced features.
Basics
When you access a shared spreadsheet you will be presented with a view similar to the one below. This is an image taken of the MT-WY Families spreadsheet, which is displaying the sheet (tab) All Contact Info by Name (see the green lettering in the tab at the bottom). This sheet is an alphabetic listing of all of the Montana and Wyoming families by last name.
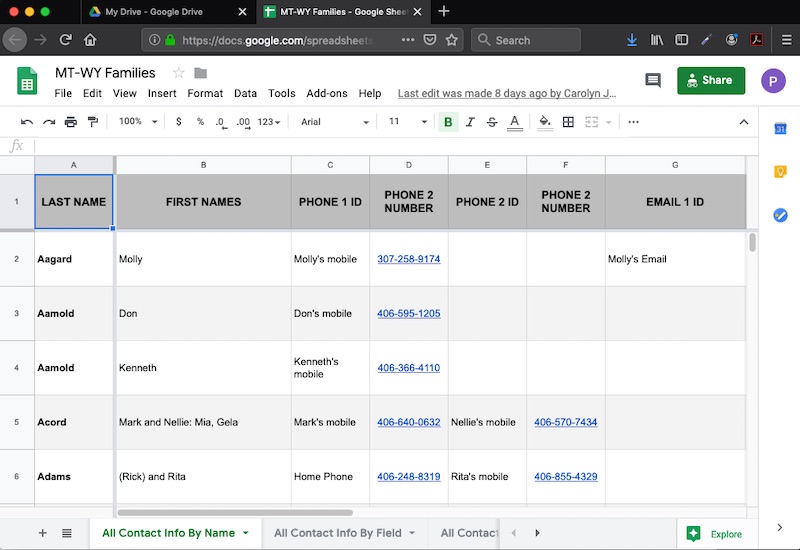
The basic actions you will perform regularly on the MT-WY Families spreadsheet—used for illustration here—include:
- Scrolling or swiping left and right will let you see all of the information in each row of the spreadsheet.
- Scrolling or swiping up and down will display all of the rows in the spreadsheet
- Each cell with content presented in blue lettering is clickable.
- Clicking on the "blue-lettered" content of such a cell reveals a hyperlink (which is sometimes difficult to see on the small screens of a smart phone).
- Clicking then on the revealed hyperlink causes the hyperlink to be followed, resulting in an action.
- For blue phone numbers, when using an iPhone or Android phone, the phone's dialer will appear with the clicked phone number already inserted for easy calling. On devices other than a phone, the result varies. For example on a Mac computer, the FaceTime app might be invoked, ready for connection. It may be that there is an intermediate step or two you might need to perform, particularly on an iPhone, before the dialer appears. It should be clear what to do in this case.
- For blue email addresses your default email message window will appear with the email address of the recipient already inserted in the "To:" line, ready for typing.
- For blue location addresses Google Maps will be appear with the proper location of the address pinned to the map, ready for navigation.
One Spreadsheet, Many Sheets
Each Google spreadsheet you create or share can contain many individual sheets. The shared spreadsheet pictured below is MT-WY Families. The red, green and blue arrows point to individual sheets within this spreadsheet. The names of the sheets are in the tabs. Green lettering for the the name of a sheet (tab) indicates the sheet that is in view at the moment; you can see that the sheet currently in view is the one named All Contact Info By Name. To open a different sheet, simply click on its tab
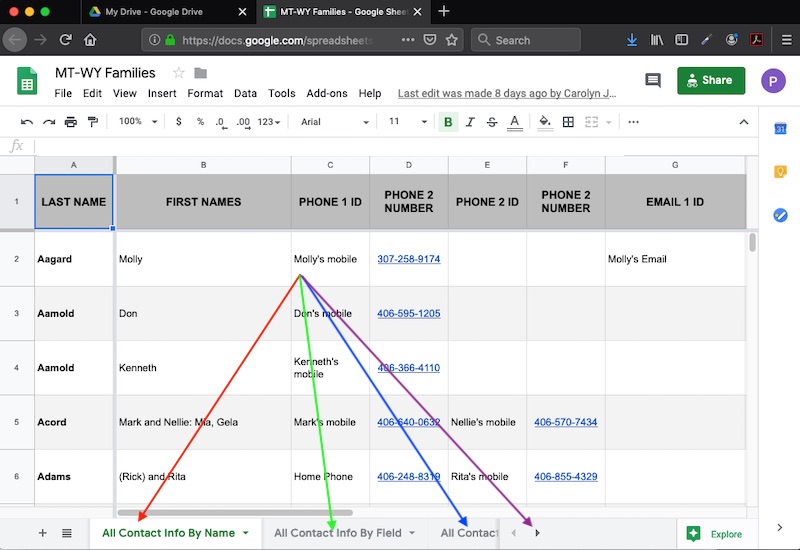
Now notice the purple arrow in the image above.
- If you are using a shared spreadsheet in a browser window, most typically while you are on your computer, you will see the right arrowhead that the purple arrow points to. Clicking on that arrowhead will reveal more sheets (tabs) if there are any.
- If you are using a shared spreadsheet in the Google Sheets app installed on your smartphone, iPad, or Android tablet, you will usually just swipe left and right on the sheets (tabs) row to see all available sheets.
Where to From Here?
With completion of this tutorial you have the necessary knowledge to use all aspects of a shared spreadsheet. However, before you quit, we suggest that you also do the Searching Sheets tutorial that follows this one in the Using Sheets menu item above, as it provides a shortcut that replaces scrolling for finding a contact in shared sheets.
As it becomes helpful to do so, we will include more short tutorials on using shared spreadsheets in this same Using Sheets menu shown in the Menu bar above. For hints and answered questions about Google Sheets and their use, see the menu items under the Google Sheets section above. The hints and answered questions sections will be populated with information as questions and observations come in.